/
Scan for Spyware
Scan for Spyware
Computers running recent versions of Microsoft Windows have Windows Defender installed and configured to regularly scan for spyware automatically in the background. CIS recommends an additional anti-spyware solution such as Spybot: Search & Destroy.
Remove Spyware using Spybot: Search & Destroy
- Download and Install the free version of Spybot: Search and Destroy.
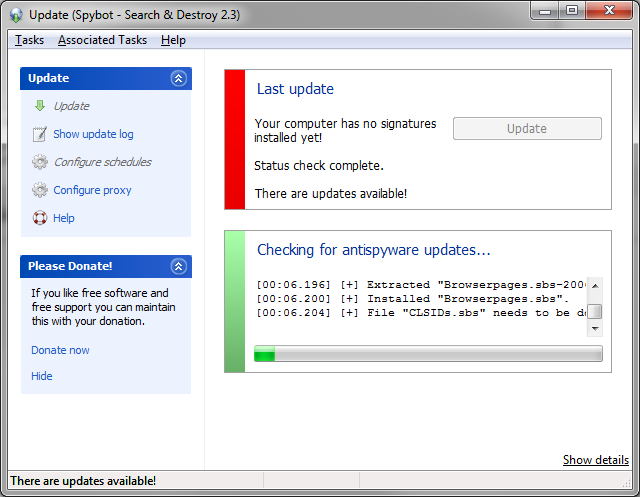
- Upon first run, Spybot should prompt to update. Click the Update button to proceed with getting the latest spyware definitions.
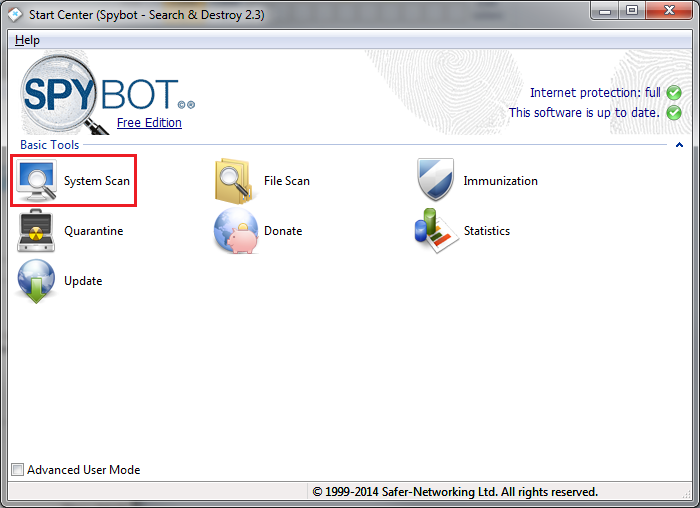
- Once the application is updated, close the Update Window. Open the Start Screen window (this should have opened automatically with the Update window).
- Click System Scan to open the scan window. If you receive a security prompt, click Yes to allow the program to continue.
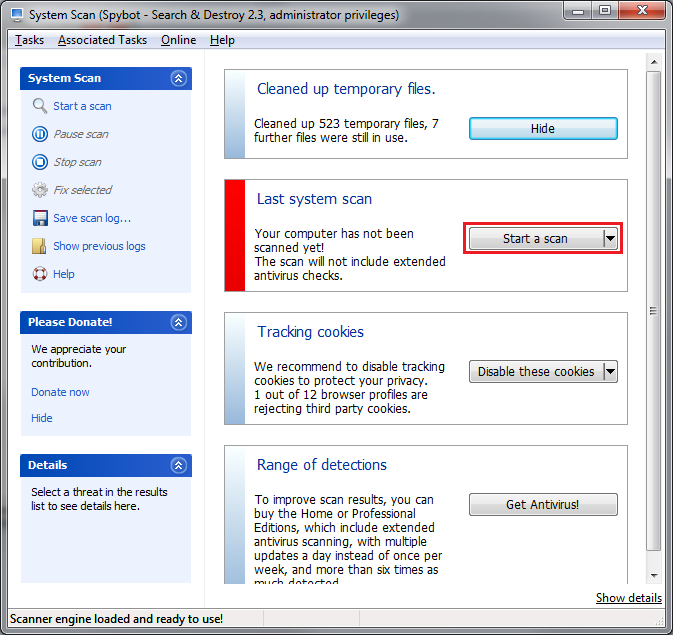
- On the System Scan window, click Clean Temporary Files to clean up temporary files that may slow down scans.
- On the System Scan window, click Start a Scan to begin a scan for spyware.
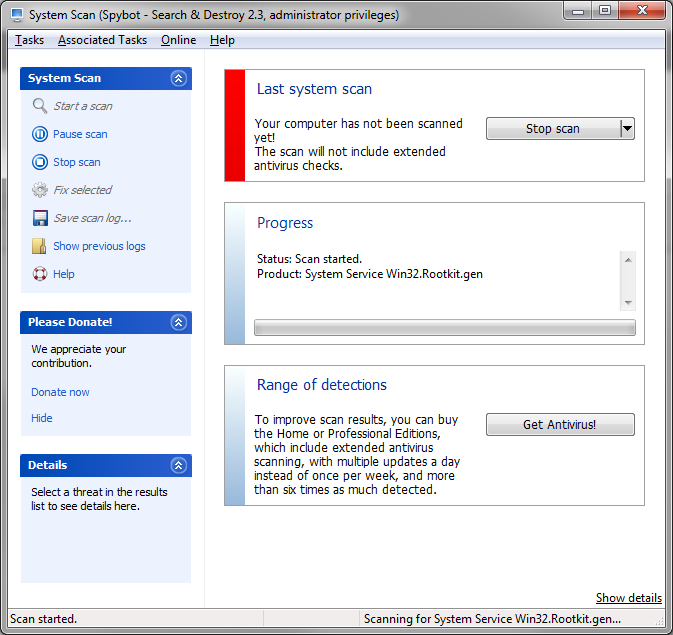
- The scan progress will be shown. Click Stop Scan at any time to cancel the current scan.
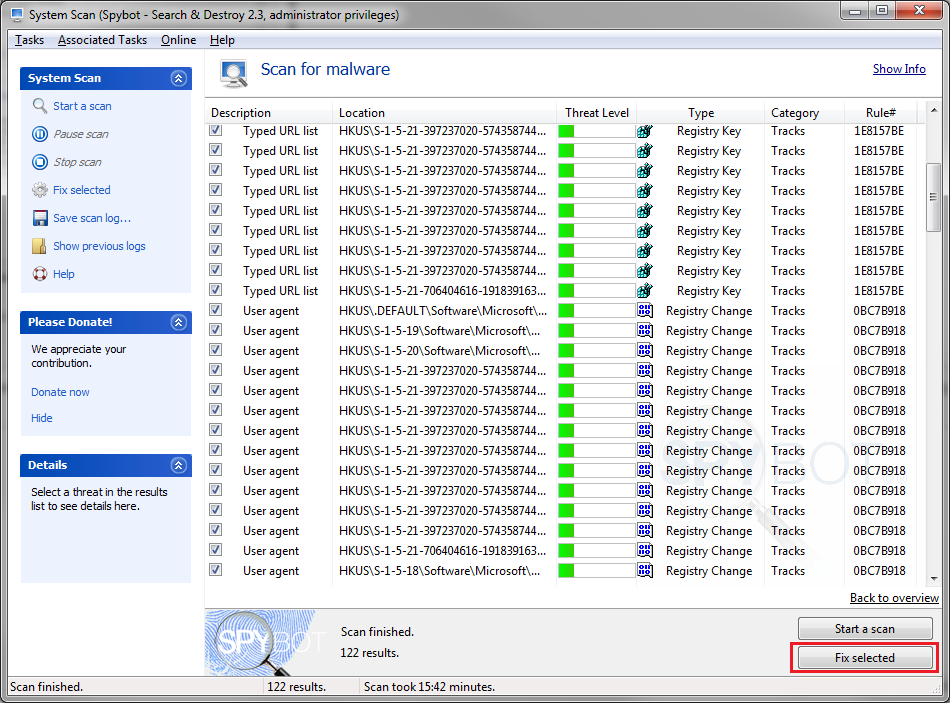
- Once the scan completes, results will be shown. Click Fix Selected to resolve any detected problems that were found during the scan.
Spybot Search & Destroy v2 is used in these instructions. The older version of Spybot, v1.62, provides similar functionality as Spybot version 2. However, the instructions for completing a scan and user interface differ greatly between the two versions of this product.
Related articles
, multiple selections available,
