Create e-Portfolio using WordPress.org
- Helen Gong
- Grace Seo
Difference between WordPress.com and WordPress.org
WordPress.com is a platform that can provide services for self-hosted websites. A self-hosted website has its own domain and the owner of the website are free to make changes to the site files in order to customize the website and add any needed functions. All users need to signup for their accounts, pick up domains, try themes and design their sites from the real beginning. WordPress.com offers multiple plans starting with the basic free account. For more services and options, such as adding a custom theme, users can move up to paid plans. WordPress.org is a hosted site that uses web space provided by a hosting company.
In our specific context, WordPress.org is a paid plan supported by SPU ETM, and its availability for certain projects depends on the funding situation and university priorities.
Launch your site dashboard
We have created a portfolio site for each student who are enrolled in the project. Each student can launch the site using the link issued by SPU and manage posts, pages and site design through site dashboard.
We suggest students to create blogs/posts first before finalize the holistic design. With blogs/posts and pages, you could see how different themes apply to your portfolio design visually to meet your needs.

Create posts/blogs
- Navigate to the site dashboard.
- Click on Posts and Add New.

**Remember that you need to add a new post not a page.
- Create a title of the new post.
- Create the post body by clicking on "+" to get more options, such as image, video or paragraph.

- After you complete the post, you may want to add a category. The category can help to organize your posts and you could use it as a filter to demonstrate certain posts purposely.

- You could add a feature image attached to this post if you want to show it on your portfolio homepage.


- When you're done, click the Publish button to share your post with the world.
Design e-Portfolio homepage
There are several ways to design e-portfolio homepage, you could set the homepage display the latest posts (the layout will be various based on the theme you selected); you could create a page as the static homepage including links to your posts; you could add menus linked to your posts...Just make sure your e-portfolio is accessible.
Display the latest posts
Using this way to demonstrate your portfolio, the homepage will not be a static page. It will be updated when you have new posts. The layout depends on the theme you selected.
Example: the theme of Pixgraphy - Version 1.3.7 is selected and layout is set as photography.

Display a static page
Using this way, your portfolio will be demonstrated as a static page. You need to create some links to grant audiences access to your posts. You don't need to rely on the theme too much but you need to spend more time on designing.
Example:
Use menu to improve accessibility
We suggest you create menus on the portfolio site to increase accessibility to your posts. The menu areas depends on the theme you selected. You’ll create a menu, assign it a location, and add menu items, such as links, pages, posts and categories. If your theme has multiple menu areas, you might need to create more than one. If your theme has widget area, you also can locate a menu (you have created in the Menus tab) to the widget area by adding a navigation menu.
Example:


- Customize the site.
- Click on Menus.
- Create new menu.
- add items, such as links, pages, posts, categories (if you create and assign categories to your posts) …
Query Loop
If you want to create a page as the placeholder for your posts, you may use Query Loop.
- Navigate to site dashboard.
- Click Pages and Add New.
- Create the page's title.
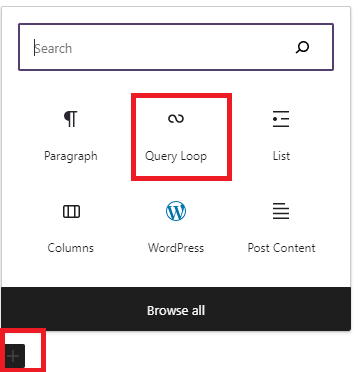
- Create a block of Query Loop: click + icon and search Query Loop.
- Choose a pattern to demonstrate posts.

- Setup Query Loop
- Navigate to the Query Loop settings.
- Toggle off the setting of inherit query from template.
- Setup the column number.
- Add a filter if you want to show certain group of posts, by categories, or tags.

Additional Resources
Filter by label
There are no items with the selected labels at this time.