/
Live Captions in Zoom
Live Captions in Zoom
Using Live Captions in a Meeting
When the meeting host has enabled captions, as a participant, you will see the controls that allow you to turn on and off the live captions during a meeting.
- When enabled by the host, you will see a notification above Closed Caption/Live Transcript in the meeting controls, informing you that one of these services is available.
- If closed captioning is available, click Closed Caption to start viewing closed captioning.
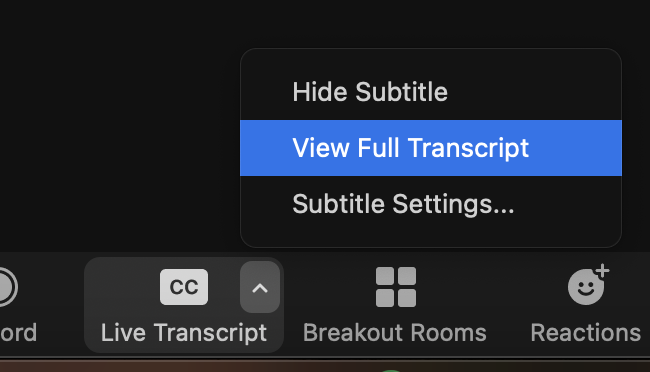
- You can also click Live Transcript , and then select View Full Transcript which will append a running transcript to the side of your Zoom window. This menu can also pop out and be moved to a different location.
Note: The provided subtitles can be clicked and dragged to move their position in the meeting window.
Changing the Way the Captions Look
- During a meeting click the ^ icon next to the CC button and choose Subtitle Settings.
- You can also click the up ^ next to Start Video / Stop Video.
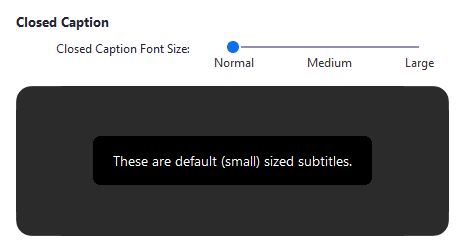
- Click Video Settings then Accessibility.
- Move the slider to adjust the caption size.
If you need different instructions for your mobile device or web browser, please see the Zoom Tutorials about Viewing Live Captions.
How to save the transcript?
- If the host has allowed you to save transcripts, you can click on the upward arrow next to the CC icon to expand the Live Transcript Option Menu.
- In the option menu, click View Full Transcript.
- In the transcript window, select Save transcript. The transcript file will be saved to the default Zoom folder in the computer.
- To view the file location, click Show.
Need help with your Captions?
If your captions aren't working in your meeting or your students have difficulties with the captions, please reach out to the CIS HelpDesk at help@spu.edu or at 206-281-2982.
, multiple selections available,
Related content
Additional Zoom Features
Additional Zoom Features
More like this
Zoom
Zoom
More like this
Captioning Panopto Videos
Captioning Panopto Videos
More like this
Zoom System Requirements and Roles
Zoom System Requirements and Roles
More like this
How to use PollEverywhere in a Zoom meeting?
How to use PollEverywhere in a Zoom meeting?
More like this
Zoom Room Instructions
Zoom Room Instructions
More like this


