/
Advanced Printer Settings - Windows
Advanced Printer Settings - Windows
- Moffat, Ethan
- Hernandez, Jess
- Karen Park
- Brenden, Kate
Owned by Moffat, Ethan
Steps
- Click File -> Print and select a printer that begins with MFP or SecurePrint.
- Select Printer Properties.

Note: In other applications, this may be called Properties, Print Properties, Preferences, Options, or something similar.
- A new dialog box will open. The properties are set to Black & White, with 1-sided prints.

- Uncheck the Black and White option in the lower right hand corner to print in color.

Note: the image in the upper left-hand corner changes based on the options selected.
- Click Print to continue.

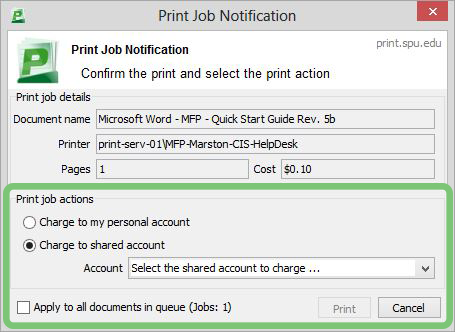
- The PaperCut dialogue box will appear. Select which account to charge the print job to.
Related articles
, multiple selections available,
Related content
Secure Print
Secure Print
More like this
Faculty and Staff Printing
Faculty and Staff Printing
Read with this
Advanced Printer Settings - Mac
Advanced Printer Settings - Mac
More like this
Bypass Tray Printing
Bypass Tray Printing
More like this
PaperCut for Windows
PaperCut for Windows
More like this
Web Print
Web Print
More like this