Overview
The following instructions will show you how to use the Microsoft Remote Desktop app to remotely connect to a campus computer.
The instructions below will only work for you if you have specifically been granted remote access to a computer, as outlined here: Remote Desktop Connection.
You will need to know the name of the computer.
Install Microsoft Remote Desktop
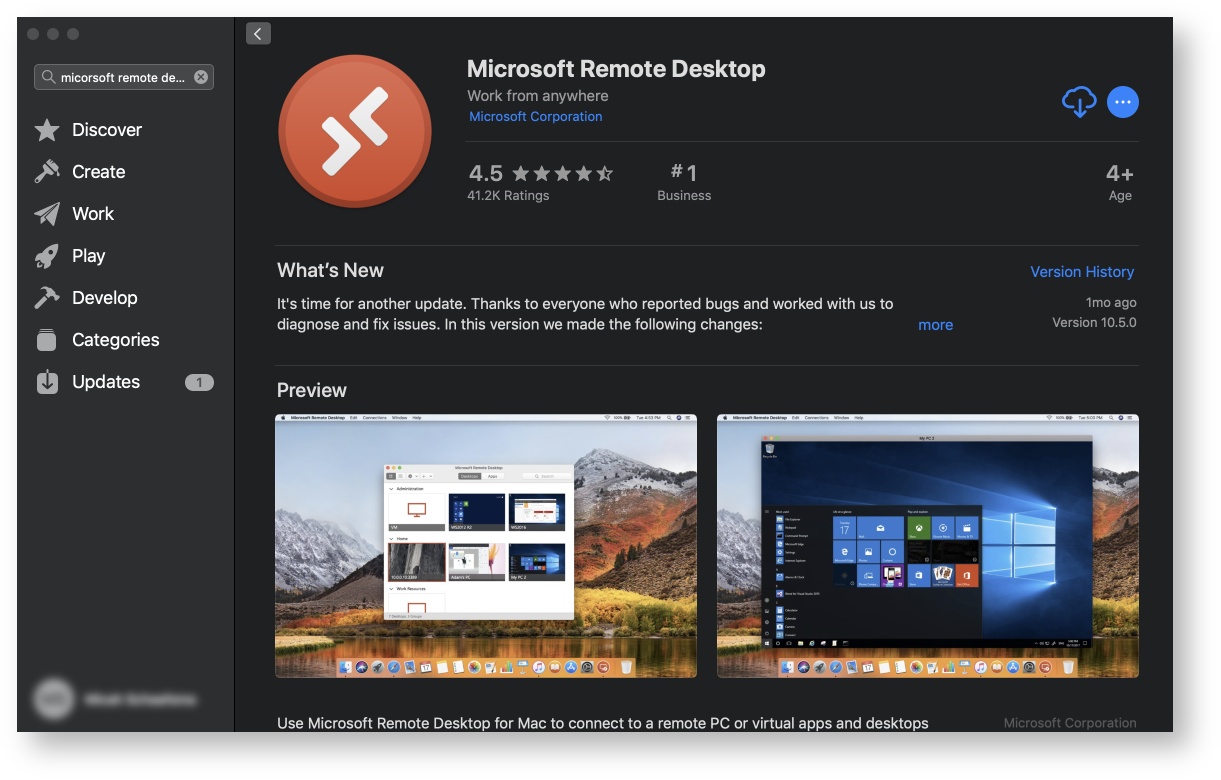
- Open the Appstore
- Search and install Microsoft Remote Desktop
- When installed open the app
Configure Microsoft Remote Desktop
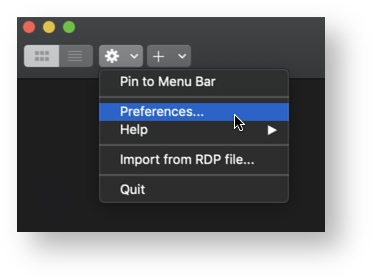
- In the top left corner click the settings cog and select Preferences
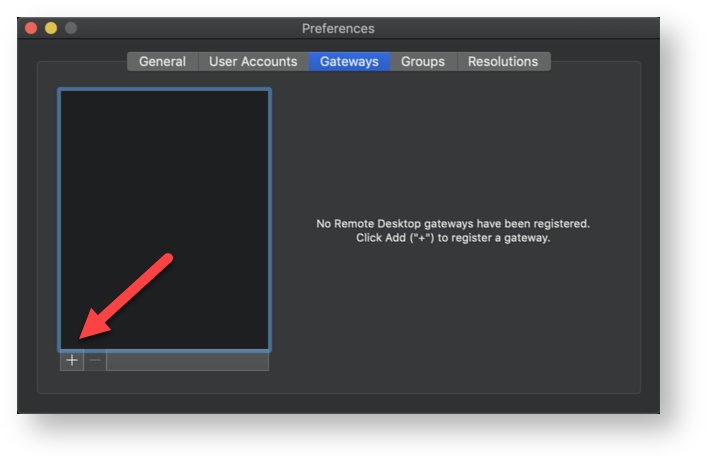
- Navigate to the Gateway tab and then the + icon in the bottom left
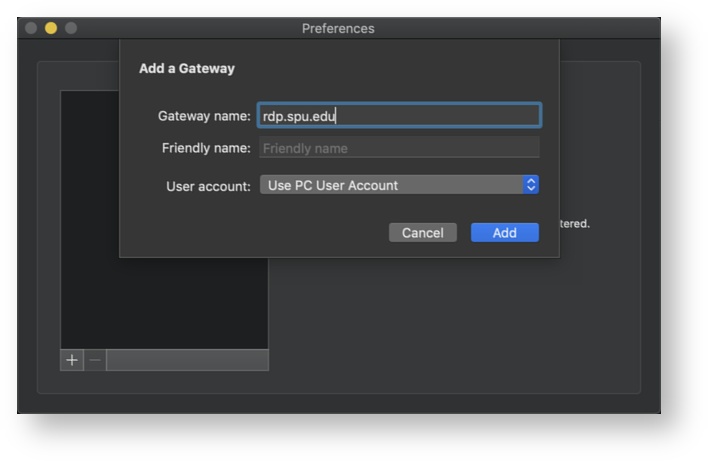
- Fill in the following fields and click Add
- Gateway name: rdp.spu.edu
- User account: Use Desktop User Account if you are using an SPU computer; otherwise see below on how to Add an account
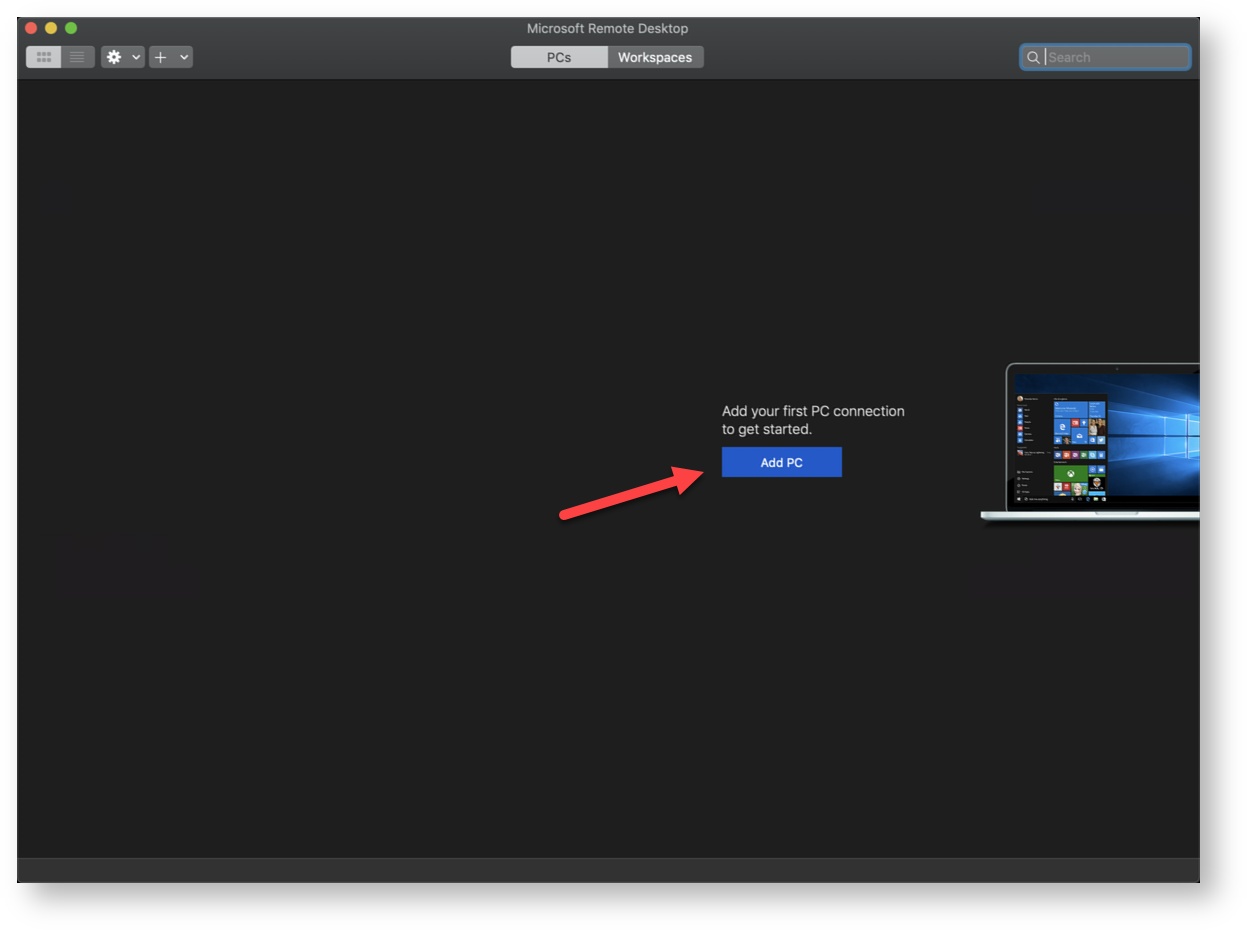
- Back on the main page click Add PC
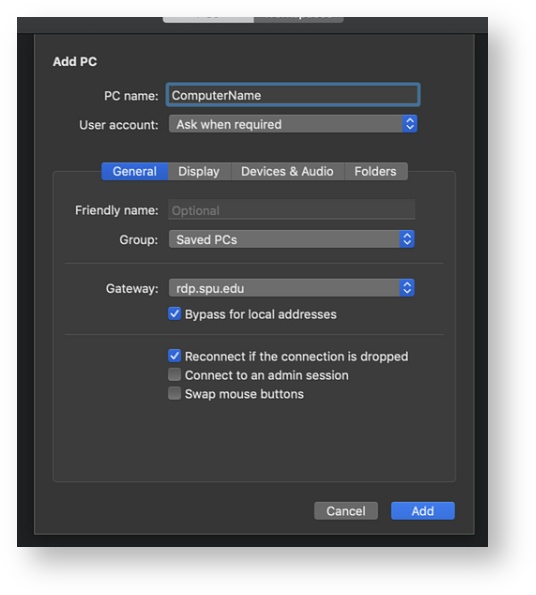
- Fill in the following fields for the Remote Connection
- PC name: [your PC's name].spu.edu
- Gateway: rdp.spu.edu
- Use the other tabs to tailor the experience to your liking
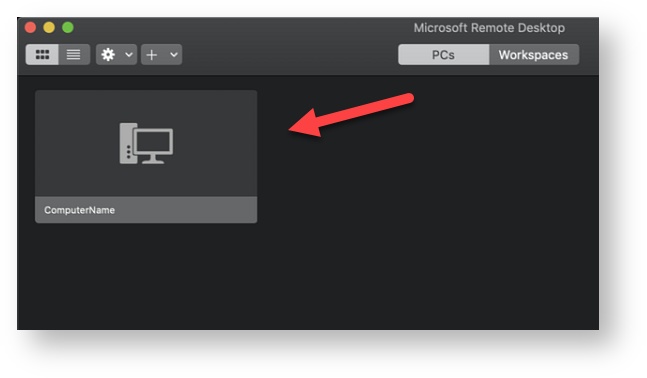
- When finished with configuring the PC connection click Add
- To connect to your remote computer just double-click the entry
Add an account
- In the top left corner click the settings cog and select Preferences
- Navigate to the User Accounts tab and click the + icon
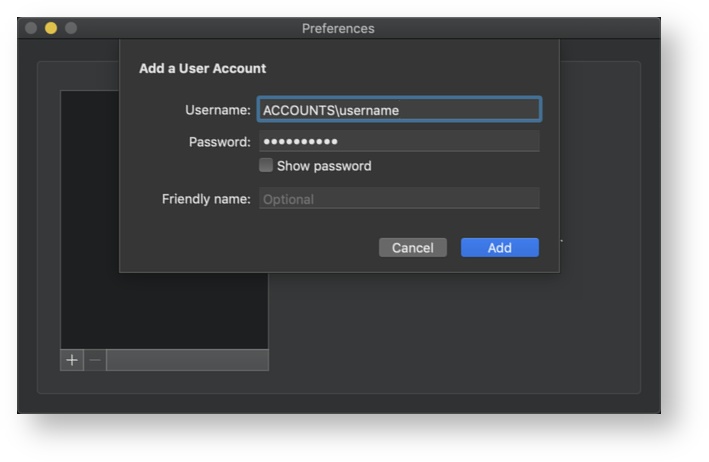
- Fill in the following fields and click Add
- Username: ACCOUNTS\[your username]
- Password: [your password]
