Get Started
Sign Up
Wordpress at first doesn't ask you to sign up.
To Create a Website:
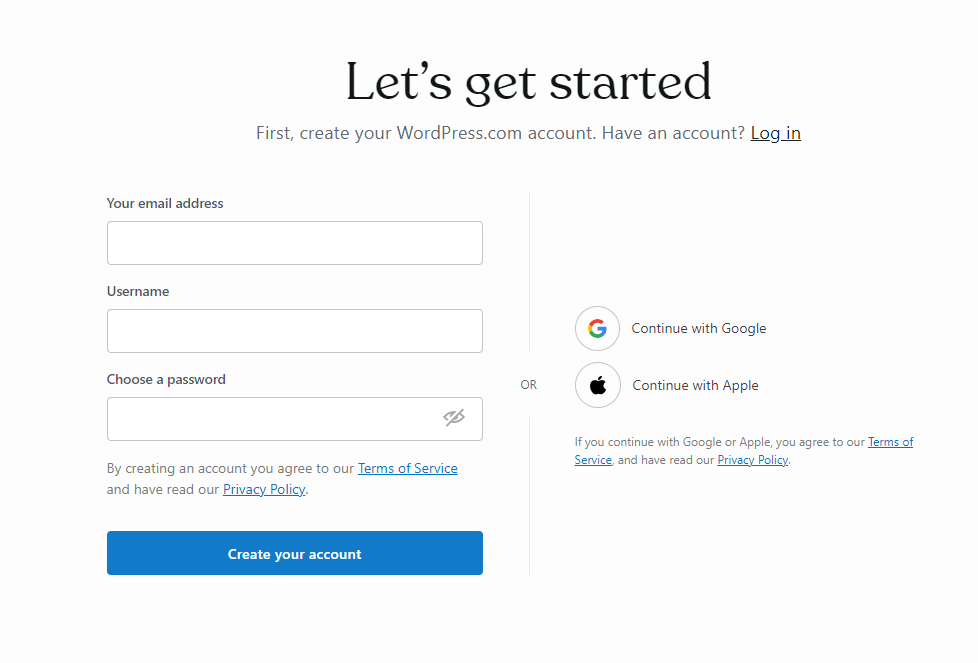
- Click on the blue "Get Started" button on the homepage.

- Fill in your email and create a username and password to sign up.
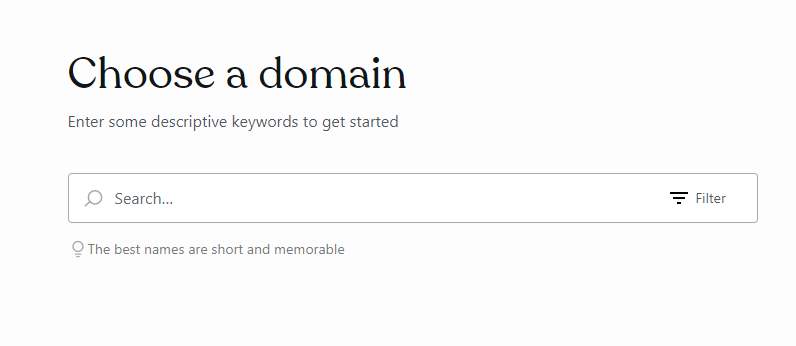
- Choose a domain.
- A free domain: You can click on "choose a domain later" and keep using the free domain provided by WordPress, such as " example.wordpress.com".
- A paid domain: If you want to use a custom domain name, such as "example.com", you need to upgrade to a paid plan. Type the domain name , WordPress will offer you the various prices of the available ones.
- Select the "Plan" that is most convenient for the purpose of your website. The four options are: Free, Personal, Premium, and Business.
- You will need to answer several questions about how you will use WordPress before it is all set. Or you can skip them by clicking on the link provided on the top left corner.

- Launch your site.
Customizing Your Theme Design
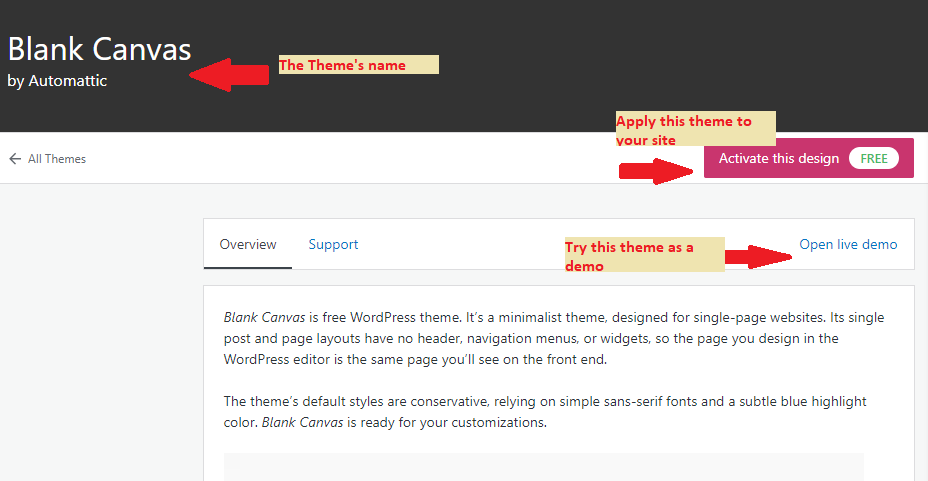
- After launching your site, you may choose a theme from a few options by clicking Appearance - Themes.
- You can learn more details about the theme by clicking it. And click Activate this design to apply the theme to your site.
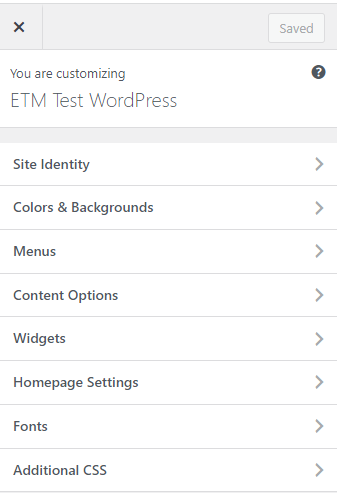
- Customize the theme you select by clicking Appearance - Customize. This will have a control panel of options on the left hand side (looks like the image below).
To customize the name of your site
Click on the "Site Identity" tab.
- Enter the name you would like your website to have in the "Site Title" box.
(In this tab you can also add a "Tagline" and add a logo if desired.)

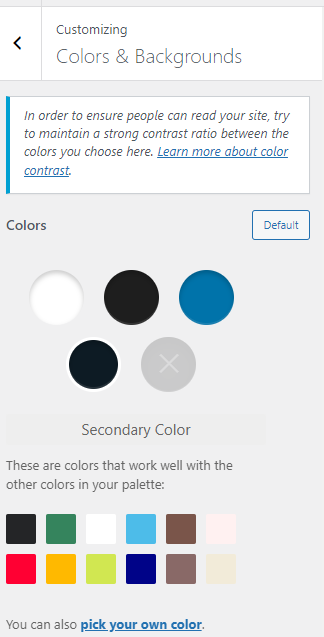
To customizing colors and backgrounds
- Click on the "Colors & Backgrounds" tab to change the color of your site.
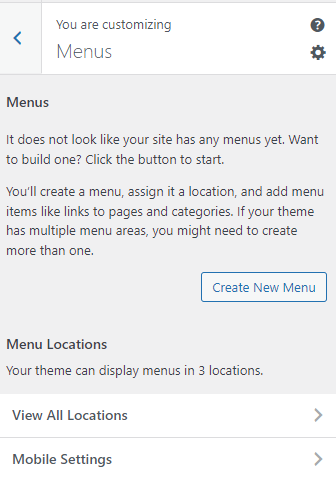
To customizing menus
- The menu areas depends on the theme you selected. You’ll create a menu, assign it a location, and add menu items like links to pages and categories. If your theme has multiple menu areas, you might need to create more than one.
-

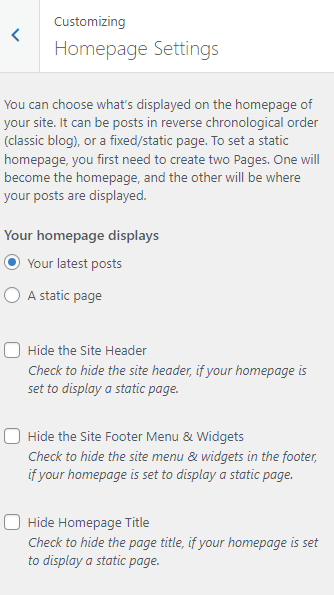
To customizing homepage
- Click on "Homepage Settings" tab. This will take you to a screen with two options: "Your latest posts" or "a static page".
- "A static page" means that the main homepage will be constant every time someone visits your website, such a post or a page.
- "Your latest posts" means that the main homepage will be changing. Whenever you write a new blog post, it will be the first page someone will see when they visit your page.
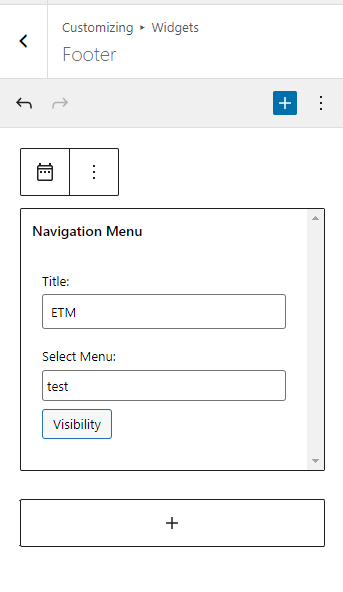
To customizing widgets
- The widget areas depend on the theme you selected. You may design Header or/and Footer areas by clicking the tab of "Widgets". You also can locate a menu (you have created in the Menus tab) to the widget area by adding a navigation menu.

First Blog Post
Within the front page, you may see that there is already wording in it. Within this wording, there is a link that will take you to a new blog post template. If you already like the front page setup, you can simply type into the different boxes and edit the images on that front page.
- Click on the link "Start a new post"
- Start Typing in your Title
- Under the Title and options bar, you can start typing your body paragraphs.
- Use the options bar to fix the body paragraph
- The right hand side panel is very helpful as well: Add images, change the post format, add location, or delete your post.